How to reboot Slackware gracefully after Kernel panic

 l!nux  Comments Off on How to reboot Slackware gracefully after Kernel panic
May 302011
 
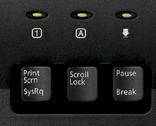
Where is SysRQ?

Where is SysRQ?

First of all.

It happens.

Don’t panic.

When the Kernel sees an error that can’t be avoided with his casual means, Kernel panics.

This can be seen as an error message in console and with blinking “Caps lock” and “Scroll lock” indicators on your keyboard. Even if something happened, you are in X.org and you can’t see the console Panic message but see the blinking LED indicators – Kernel has panicked. You don’t have access to your system anymore.

Again. Don’t panic. This error is sometimes seen as often as BSOD in Windows vintage ’98.

Most of the present day editors will auto-save your work often, so you probably have a work copy of your document from 5 minutes ago. This is not a reason to panic. The only reason to be a bit wary is, the hard drive needs to be synchronized with the cache. To execute the command “sync” with panicked Kernel is actually quite possible (see below).

The system invokes Panic when there is unrecoverable error. It’s locked out, so there is no future harm, data loss or security breach. It’s not necessarily something bad. You only need to restart and have a look what actually broke.

There are few things you need to do for graceful restart.

  • Get back control of your system (keyboard)
  • Synchronize the cache with the disk.
  • Issue a clean sigTerm and sigKill on all processes.
  • Reboot, so you can have a look at logs and what the hell broke.

There are magic key strokes, that can do all of this and they are invoked by holding “Alt + SysRq” and pressing some of the buttons of the character keyboard.

  • Alt + SysRq + R will try to Retake back the keyboard,
  • Alt + SysRq + E will try to gracefully tErminate all processes so they flush and clean,
  • Alt + SysRq + I will send signal kIll to all processes,
  • Alt + SysRq + S will Sync,
  • Alt + SysRq + U will Unmount and
  • Alt + SysRq + B will reBoot.

If you have a look at the letters REISUB and read backwards, you will get BUSIER. So just remember BUSIER for next time the system goes BUSY with Kernel Panic 😀

There is longer way to remember it, but I never liked it. It’s “Reboot Even If System is sUper Broken”. In my opinion BUSIER is much easy to remember. Just remember to apply it backwards or you will simply just reboot with Alt + SysRq + B.

So, now we can have a look, what happened to our Kernel that led to panic. Have a look at /var/log/messages and search for the last restart logged. (less uses the slash-sign for searching. Just press “/” and write “restart”. Then with “/” and “Enter” you issue find-next, until no more are found)

bash-4.1# cd /var/log/
bash-4.1# cat messages | less
...
May 30 12:04:44 stoill -- MARK --
May 30 12:23:57 stoill kernel: [11970.623138] Bluetooth: Core ver 2.15
May 30 12:23:57 stoill kernel: [11970.623189] NET: Registered protocol family 31
May 30 12:23:57 stoill kernel: [11970.623193] Bluetooth: HCI device and connection manager initialized
May 30 12:23:57 stoill kernel: [11970.623198] Bluetooth: HCI socket layer initialized
May 30 12:31:45 stoill syslogd 1.5.0: restart.
...

Something obviously gone bad with the Bluetooth USB I inserted in the machine. Problem found, but I will not try to bore you to death with details.

Anyway. If you try to execute those Keystrokes without panicked Kernel (REISUB while holding Alr+SysRq), you will make graceful sync + reboot on your machine. If you do only the “RE” part while in X, you will close everything and make it to Login screen really fast. And if you do Alt+SysRq+S, you will sync all unsaved cache to HDD. Good to know.

If yow want to learn all possible Alt + SysRq key strokes and what they do, refer to the Kernel archives here, and happy hacking 😉
 Posted by at 3:50 pm
May 252011
 

WordPress is so far the blog software that I liked most. Tried few others, but this one beats them with easiness and intuitive work. Supports tons of good stuff and is very often updated by the developers team.

I assume you already have latest Apache and MySQL installed. If you don’t, please get the latest packages from Slackware and install them:

su
cd /root
mkdir /temp
cd temp
wget ftp://ftp.slackware.com/pub/slackware/slackware-current/slackware/n/httpd-2.2.17-i486-3.txz
wget ftp://ftp.slackware.com/pub/slackware/slackware-current/slackware/ap/mysql-5.1.56-i486-1.txz
installpkg httpd-2.2.17-i486-3.txz
installpkg mysql-5.1.56-i486-1.txz
cd /etc/rc.d/
chmod +x rc.httpd
chmod +x rc.myslqd
cd ../httpd
echo "Include /etc/httpd/mod_php.conf" >> httpd.conf
sed 's/index.html/index.php/' httpd.conf > httpd.conf.new
mv httpd.conf httpd.conf.old
mv httpd.conf.new httpd.conf 

cd ../rc.d/
./rc.httpd start
./rc.mysqld start
sudo -u mysql mysql_install_db
./rc.mysqld restart

(Edit 01 march 2012) You may also need to edit httpd.conf and enable the php application manually by typing this in the end of file:

AddType application/x-httpd-php .php

(Missed it, and added it thanks to gr1ph for posting it in LinuxQuestions forum).

There, you are set with a web server and a database server. If you are using an old Slackware, I suggest full update to -current. First of all, latest Apache has all the security quirks and perks for a lazy Administrator like me and mod-PHP built-in which can be enabled with 1 command in total. And second – What I’ve learned in the last 10 years of system administration is “Don’t be a victim to exploits of old and obsolete software packages, when you are running your own servers”. The script kiddies never sleep. My own server is scanned for open exploits 10 to 15 times each day.

There was once a bug, that created the directories in /var/lib/mysql with owner root:root. Please check if this is so and make them to mysql:mysql. No databases will be created if you leave them this way and even your root account will not be able to use the mysql. (you may want to have a look at this guide too)

chown -R mysql:mysql /var/lib/mysql

If you know or can do alone all of the above – The WordPress itself in few steps.

su
cd /root/temp
wget http://wordpress.org/latest.tar.gz
tar -xzvf latest.tar.gz
cp -R wordpress /srv/httpd/htdocs/

mysql -u root -p
CREATE DATABASE wpbase;
GRANT ALL PRIVILEGES ON wpbase.* TO "wordpressuser"@"localhost"
 IDENTIFIED BY "0neExtremelyCompl3xPassword";
FLUSH PRIVILEGES;
exit

cd /srv/httpd/htdocs/wordpress
mv wp-config-sample.php wp-config.php
mcedit wp-config.php

What we need in this config file? Imagine you did everything I suggested above, the file should look like this:

define('DB_NAME', 'wpbase');
define('DB_USER', 'wordpressuser');
define('DB_PASSWORD', '0neExtremelyCompl3xPassword');
define('DB_HOST', 'localhost');
define('DB_CHARSET', 'utf8');
define('DB_COLLATE', '');

… but of course, I suggest you don’t use the user and password from this howto 🙂 at least I did not.


So, that’s it. Everything in the backend is set and working.

The only thing left is to set WordPress from its wp-admin panel. Start a browser and go to this address http://127.0.0.1/wordpress/wp-admin/install.php
Set the title of your new blog and setup an user and password for login (not necessarily the same as the ones we used above, this will be your web-admin user). When you are done, check http://127.0.0.1/wordpress/index.php your new blog is there.

Login and set various settings as your site name, your design template and so on.

If this whole article is a bit hard and look like gibberish in japanese – try installing it in Windows. It’s not “that hard”.

 Posted by at 4:54 pm

How to make transparent bridge with Slackware Linux.

 l!nux  Comments Off on How to make transparent bridge with Slackware Linux.
May 182011
 

What is a transparent bridge and why to use it?

Few lines of dry theory first:

  • Transparent bridges are used for various tests and security applications.
  • Sniffing traffic. (I did this a lot when I worked as QA)
  • Delaying traffic and adding loss for testing purposes.
  • Logging part of the traffic, without the user notice.
  • Firewalling packets, not intended for your network without additional routing.
  • Other, we don’t want/need explained (as shaping your GF PC, because she uses too much BW for music while you play MMORPG, or simply spying on her chat logs.)
Simple bridge

Simple bridge

Basically, we need a Slackware (or any other) Linux box with 2 NICs (network interface cards). In this scenario, we will make a transparent bridge suitable for sniffing traffic and introduce you to some software for this needs. The PC behind the Slackware box should be set with the TCP/IP settings to access the Internet. The bridge we set in front of this PC will be absolutely transparent for any packets passing between the PC and your service provider switch. Have a check if you have the following commands: tc, brctl, tcpdump:

bash-4.1# which tcpdump
/usr/sbin/tcpdump
bash-4.1# which tc
/sbin/tc
bash-4.1# which brctl
/sbin/brctl
bash-4.1#

The packages we need for this are coming with your distribution and no additional software is needed. Those packages are probably already installed. However, if you made minimal install or did not put category Network, now is the time:

wget ftp://ftp.slackware.com/pub/slackware/slackware-current/slackware/n/bridge-utils-1.4-i486-1.txz
wget ftp://ftp.slackware.com/pub/slackware/slackware-current/slackware/n/tcpdump-4.1.1-i486-1.txz
wget ftp://ftp.slackware.com/pub/slackware/slackware-current/slackware/n/iproute2-2.6.37-i486-1.txz
installpkg bridge-utils-1.4-i486-1.txz
installpkg tcpdump-4.1.1-i486-1.txz
installpkg iproute2-2.6.37-i486-1.txz

What’s left to do is to enable the linux box to bridge the connection between the Internet and our PC:

bash-4.1# brctl addbr br01
bash-4.1# brctl addif br01 eth0
bash-4.1# brctl addif br01 eth1
bash-4.1# ifconfig br01 up
bash-4.1# brctl show
bridge name	bridge id		STP enabled	interfaces
br01		8000.00064f295019	no		eth0
							eth1
bash-4.1# ifconfig br01
br01      Link encap:Ethernet  HWaddr 00:06:4F:29:50:19
          inet6 addr: fe80::206:4fff:fe29:5019/64 Scope:Link
          UP BROADCAST RUNNING MULTICAST  MTU:1500  Metric:1
          RX packets:0 errors:0 dropped:0 overruns:0 frame:0
          TX packets:6 errors:0 dropped:0 overruns:0 carrier:0
          collisions:0 txqueuelen:0
          RX bytes:0 (0.0 b)  TX bytes:468 (468.0 b)

bash-4.1#

The bridge is actually up and running after 10 to 15 seconds depending on how fast your Linux box is and what kernel you use. If your ISP is filtering your MAC address in his database, change yours according to the one of your PC’s network card:

bash-4.1# ifconfig br01 hw ether 00:11:22:33:44:55
bash-4.1# ifconfig br01
br01      Link encap:Ethernet  HWaddr 00:11:22:33:44:55
          inet6 addr: fe80::206:4fff:fe29:5019/64 Scope:Link
          UP BROADCAST RUNNING MULTICAST  MTU:1500  Metric:1
          RX packets:0 errors:0 dropped:0 overruns:0 frame:0
          TX packets:6 errors:0 dropped:0 overruns:0 carrier:0
          collisions:0 txqueuelen:0
          RX bytes:0 (0.0 b)  TX bytes:468 (468.0 b)

bash-4.1#

In this case, you need to rewrite your PC’s MAC address with something else (even random one). Because there will be duplicate MAC address and your Linux box will complain about it. With this set, your home PC will have bridged connection to the ISP with one transparent linux box in between.

The sniffing itself, can be done in 2 ways. With tcpdump and with Wireshark. The first is quick and elegant, the second is pretty and powerful.

bash-4.1# tcpdump -c 100 -i br01 -w dumpfile.pcap
tcpdump: WARNING: br01: no IPv4 address assigned
tcpdump: listening on br01, link-type EN10MB (Ethernet), capture size 65535 bytes
100 packets captured
100 packets received by filter
0 packets dropped by kernel
bash-4.1#

The above explained, -c 100 means get 100 packets (c=count), -i br01 does not need explaining and -w writes at a specific dump file. More for the .pcap extension, below.

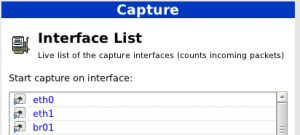
Capture interfaces

Capture interfaces

If we want the same done with Wireshark, we need to have some Xorg installed and some neat window manager as xfce4 (my own preference since KDE 4.x become one hell of a process spawning Hydra too big for a pentium 4 single core with some cheap video card). You may get this powerful software from its  website. The best  part in Wireshark is compatibility with tcpdump files captured with console. They are both based on the library libpcap and don’t need much transformation of the data they operate with.

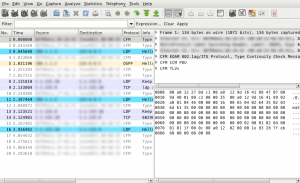
Captured file

Captured file

So if you need more depth in the packet analysis, get Wireshark and learn how to use it. If the Linux box has console only (You may prefer it that way), use tcpdump to capture traffic and analyze it in Wireshark. The only minus is, Wireshark is more useful on the bridge, much more interactive and can create an ACL list for you directly from the captured traffic. If you want specific address, that’s bugging you filtered – go to the ACL menu and generate iptables rule with 2 clicks and just apply it. It works like a charm.

Now, if we want to delay the traffic a bit, we need to set some additional rules for traffic control. In a nut shell:

bash-4.1# ping 10.3.71.17
PING 10.3.71.17 (10.3.71.17) 56(84) bytes of data.
64 bytes from 10.3.71.17: icmp_req=1 ttl=128 time=0.128 ms
64 bytes from 10.3.71.17: icmp_req=2 ttl=128 time=0.130 ms
64 bytes from 10.3.71.17: icmp_req=3 ttl=128 time=0.126 ms
64 bytes from 10.3.71.17: icmp_req=4 ttl=128 time=0.131 ms
^C
--- 10.3.71.17 ping statistics ---
4 packets transmitted, 4 received, 0% packet loss, time 2999ms
rtt min/avg/max/mdev = 0.126/0.128/0.131/0.014 ms
bash-4.1# tc qdisc add dev eth0 root netem delay 1s 
bash-4.1# ping 10.3.71.17
PING 10.3.71.17 (10.3.71.17) 56(84) bytes of data.
64 bytes from 10.3.71.17: icmp_req=1 ttl=128 time=1000 ms
64 bytes from 10.3.71.17: icmp_req=2 ttl=128 time=1000 ms
64 bytes from 10.3.71.17: icmp_req=3 ttl=128 time=1000 ms
64 bytes from 10.3.71.17: icmp_req=4 ttl=128 time=1000 ms
^C
--- 10.3.71.17 ping statistics ---
5 packets transmitted, 4 received, 20% packet loss, time 3999ms
rtt min/avg/max/mdev = 1000.130/1000.135/1000.149/1.000 ms, pipe 2
bash-4.1#

Lots of other stuff can be done with this bridge and Netem (network emulator) but it is far beyond this simple guide.

For further reading.

 Posted by at 6:32 pm