Pickled hot green peppers
I prefer doing them this way, because it’s easy and the margin of errors is low 😉 They are also natural and healthy. No preservatives. Lot of vitamin C. Quite easy to eat if you can’t tolerate very spicy food. And TASTY 😀
What do you need?
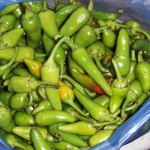
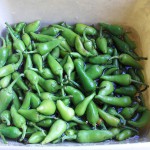
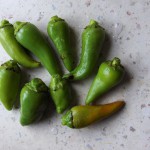
1 kilogram (2 pounds) of small hot green peppers.
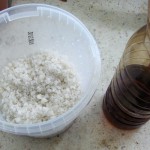
3-6 tablespoons of sea salt.
120 ml natural wine or apple vinegar.
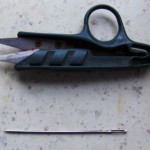
1 huge needle
1 scissor or other tool to cut the pepper handles.
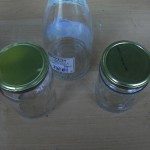
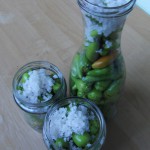
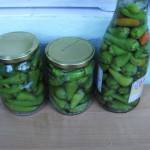
3 big jars, I prefer type “Omnia” (left and right on the picture) but you can use all other types, that can hold 600 ml liquid. Even old wine jug (center of picture)
Preparation?
- Wash everything clean.
I mean It!
Clean! Not just rinsed and wet. Clean. Soak them for 10 minutes in cold water. Put some liquid soap. Rinse few times until no foam is forming.
If you are against soaps, leave 1 or 2 silver rings for 20 minutes in the water. Silver kills bacteria.
- Remove all soft, non whole, harmed or damaged peppers. They will not survive the process and may spoil the others. While the peppers are fermenting, the damaged may start to rot and will spoil the whole jar. You don’t want spoiled pickled peppers and their taste.
- When satisfied from the cleaning process, start removing the pepper handles with the scissors. If you don’t have scissors, you may also use knife.
-
Get a needle and puncture every pepper where the seeds are. If a pepper is larger (e.g. like your finger) puncture it twice. Preferable further from the first stab. We need this, so the vinegar and salt will enter into the pepper and conserve it internally too. The scissors I am using are specially made for plant cutting and you don’t get fatigue in your hand when you need to cut 200 pepper’s handles.
Remember to remove the damaged peppers. And if a pepper is only partially damaged – cut the part that’s going bad and keep the rest.
Put 40 ml of vinegar in every jar. This way you make sure, that (the right) alcohol fermentation will start in the jar.
Put 2 tablespoons of sea salt in every jar. I know this is A LOT of sodium. But the other way is to put something else that will conserve the food. And most of the “other” things start with E. E300, E282, E250, E222 etc.
Most of them are proved bad and unhealthy AND they also have a lot of Sodium themselves. Only their taste is not salty. Believe me. You prefer sea salt.
And if you don’t have sea salt – get table salt. Just use a bit less (spoon and a half) because table salt is … erm … saltier.
Almost done 😉 If you prefer additional taste I suggest you add it now. I’ve tried some other stuff in previous years and found that those can be pickled WITH the green peppers:
- Garlic
- Green tomato
- Celery stems and diced celery root
- Carrots
- Cauliflower cloves
- and lots more.
Pour water until you cover all the peppers, close the jars with their lids (or caps). Shake few dozen times until the salt is disolved. Keep them away from sunlight for 2 weeks. This is how long it takes for the fermentation to complete and the pickled peppers will be ready for consumption.
Every 3 days get the jars to the sink and lightly unscrew the caps. There is carbon dioxide forming inside. Beware, part of the liquid will try to boil out if you unscrew the lid quickly (go to the sink, remember). Put or screw the lid back quickly. This additional work can be avoided if you can afford jars or containers made especially for this kind of fermenting. They have fermentation locks on top, which allow the CO2 out, but don’t allow the O2 in. Keep oxygen out of the jar if you want to conserve the peppers for long.
2 things you need to check in those 2 weeks:
- If the jar does not *hiss* and boil on opening – something is wrong. The lid is not good and oxygen enters in the jar or the fermentation process is completed or stopped. Smell the peppers. If they smell foul instead fresh of vinegar and peppers – throw them away.
- Have a good look in the liquid. If it goes unclean and white with big “clouds” of yeast and small white pieces floating on top of the liquid – the fermentation failed – it is still fermenting, but not the right fermentation and the peppers will not conserve for long. Get them out and eat them 😀 As fast as you can 🙂 … I am kidding. Keep them in the fridge, they will be edible at least for one week after you open the jar.
This is valid for all open jars. If you can’t eat them for one week, put them to the coldest area of the fridge (below, most often, where the vegetable containers are) and keep them there.
