Slackware linux as (basic) TFTP server

 l!nux  Comments Off on Slackware linux as (basic) TFTP server
May 162011
 

Slackware has one of the most easy to install and setup TFTP servers around. It’s really simple. That’s what you do in a nut shell:

su
wget ftp://ftp.slackware.com/pub/slackware/slackware-current/slackware/n/tftp-hpa-0.49-i486-1.txz
installpkg tftp-hpa-0.49-i486-1.txz
echo "tftp  dgram   udp     wait    root    /usr/sbin/in.tftpd  in.tftpd -s /tftpboot -r blksize" >> /etc/inetd.conf
mkdir /tftpboot
chmod +777 /tftpboot
chown nobody /tftpboot
touch /tftpboot/test.txt
echo "blah blah blah" >> /tftpboot/test.txt
/etc/rc.d/rc.inetd restart
tftp 127.0.0.1 -c get test.txt
cat test.txt

That will do the job most quickly [and a little bit risky]. If you need the above gibberish explained, that’s what happens:

su

You need to be root or super user to install packages and setup configuration files  in  /etc directory.

wget ftp://ftp.slackware.com/pub/slackware/slackware-current/slackware/n/tftp-hpa-0.49-i486-1.txz
installpkg tftp-hpa-0.49-i486-1.txz
echo "tftp  dgram   udp     wait    root    /usr/sbin/in.tftpd  in.tftpd -s /tftpboot -r blksize" >> /etc/inetd.conf

Those few lines will differ a bit in other/older/newer versions of Slackware Linux, but basically, they get the package, install it and setup the tftpd daemon to start at boot time with some important parameters. If you already have the package installed, the wget and install can be skipped. The echo line in the end is quite insecure, so it’s better to open the configuration file and uncomment it’s own config line (remove the pound sign in the line beginning with #tftp dgram udp). That’s the right way to do it, if you are not in a hurry, because the command shown here will add another line in the file. No one can guarantee us, there is no such line in the file already and no one can tell if the parameters are not going to change in future version or are supported in older version. If you know what this line is actually doing – feel free to copy and paste everything. It’s enough. (If you want to know what it actually does – it starts tftpd listening on UDP port 69 for tftp commands as a root user, puts it to silent mode and operates in directory /tftpboot)

mkdir /tftpboot
chmod +777 /tftpboot
chown nobody /tftpboot
touch /tftpboot/test.txt
echo "blah blah blah" >> /tftpboot/test.txt

We create the directory, change it’s ownership to nobody and make it accessible to everyone. Than we create a test file and fill in some text which we will use for 😀 ahem … test of course.

/etc/rc.d/rc.inetd restart
tftp 127.0.0.1 -c get test.txt
cat test.txt

We restart the internet super daemon and get the file we created via tftp protocol. And just in case, we check if we got the file with the line “blah blah blah” inside in the current directory where we just downloaded it.

That’s all there is for this TFTP server. Quick and easy.

Short disclaimer: Suitable for all simple uses as getting configuration files or boot images on Cisco/Telco/Extreme and other units I have not used. Also not setting any actual securities, so if you are paranoid slacker – this article is not for you. Google for some more extensive guide.

 Posted by at 1:27 pm

Saints Cyril and Methodius Day (24 may)

 General  Comments Off on Saints Cyril and Methodius Day (24 may)
May 132011
 
Cyrillic

Cyrillic

Also called the Day of the Slavic literature and alphabet.

Saint Cyril and Methodius were born in XI century with Byzantine parents  in the city of Solun (Thessaloniki). They have influenced all of the Slavic culture and traditions, and eastern orthodox church Bible is written in Greek and the original Cyrillic developed by the brothers and their pupils.

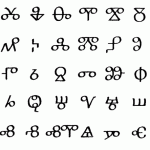
Saint Cyril and Methodius have actually created a set of signs called Glagolitsa (Глаголица) and later, their pupils and followers have simplified and evolved this set of letters to the one known in present days. This set is named after Cyril (younger of the two brothers).


Glagolic

Glagolic

The word glagol in old slavic language actually means word.  The original Glagolitic alphabet was a bit hard to understand and remember, and too different from Latin and Greek alphabets that were used widely for writing books at this time. For that reason, the Glagolitic alphabet was abandoned after the development of the Cyrillic almost half century later.

The Cyrillic is spread to wide use by the Bulgarian Tzar Boris who wished the Bulgarian church to be independent of the Constantinople. For those reasons he built two academic schools in the cities of Ohrid and Preslav and invited the remaining pupils of Cyril and Methodius to teach and develop books, codex of laws and a Slavic Bible.

From those schools, hundreds of educated pupils spread the books and bibles in the Slavic countries. It was readily adopted by many Slavic monarchs threatened by the heavy presence of western (catholic) and eastern (orthodox) churches of Rome and Constantinople.

The two brothers were finally declared saints by the Catholic church at late 19-th century by  pope Leo XIII.

Every Bulgarian school will have a holiday at this date and it’s the first day of the summer school vacation of the younger kids. There will be a small festivity held in every school with music and verses from various Bulgarian classic authors. The church will praise the saints with small procession holding in front an Icon of the brothers in large flower wreath.

 Posted by at 3:42 pm

Solving a Sudoku, part I.

 Gam3s  Comments Off on Solving a Sudoku, part I.
May 112011
 

Solving ways

Everyone’s having his own way of solving a SuDoku, some people add tons of mathematics and ruin all the fun, others start guessing randomly and make a mess, and some make it to an unknown algorithm just by trial and error 😉 I hope that sharing my few SuDoku solving ways will help you do better, even if you are tournament winner, geek mathematician or a ordinary guy with free time and a newspaper.
Some dry theory

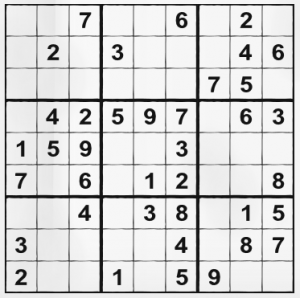
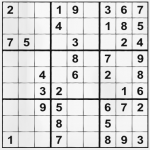
The Japanese 数独 is actually spelled “Kazu Doku”. Not sure about the exact translation but Kazu is translated as Number and Doku as Single. If we want to say “Single number” by those two hans, the sentence would sound as SuDoku as possible. If you look at the grid, every 3×3 square, every column or every row should have only one (single) digit in the range 1-9. (If you know better translation and meaning of the word SuDoku – feel free to comment) 1 game grid has 9x3x3 squares which form 9 columns and 9 rows. That’s all the actual game rules provided by Nikoli magazine that originally developed this puzzle game in 1986. Strangely, not many people know them outside Japan. If you are dedicated SuDoku fan, I suggest you pay a visit to their online magazine and get more good ideas and puzzles.

Considering the numbers set on the grid, we can tell if SuDoku is easy, normal, hard, very hard or Impossible.

Normal SuDoku grid

Easy grid

Easy grids are having almost half of the numbers filled, with 3 to 5 numbers in any 3×3 grid.

Normal grid is having 28-35 numbers with at least 3 numbers in any 3×3 grid.

Hard are the grids with 25-30 numbers leaving every 3×3 grid with 2 to 4 numbers.

Very hard are the grids with 22-24 numbers. In practice, that means every 3×3 square will have zero or up to 3 numbers inside.

Less than 22 numbers on the grid is practically having more than 1 solution, so it’s “Impossible” to be done without pencil and some preparation.

Further, I call plane any 3 horizontal 3×3 grids, (e.g. top, middle and bottom plane) and pillar any 3 vertical 3×3 grids (e.g. left, middle and right pillar). Of course – feel free to call them whatever you like. Wikipedia article calls the 3×3 grids “areas”, so we can also adopt this slang for the text below.

Simple method (a.k.a. baby steps)

Easy grid

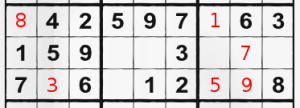
Middle plane of the above grid

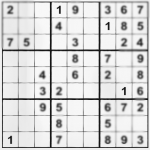
It is applicable for easy and some normal grids only. You start searching one by one all 3×3 squares for any easy numbers. Also one-by-one. e.g. Where can 1 be put according to the positions of other “1” digits in the grids and the rows around this 3×3 square. If you can’t find any digit’s position, you go to the next until you finish all 9 and return to the first. We are not robots of course. If you have a look at the grid above, you can easily see that starting from the beginning is pointless, because the grid has less numbers in top  plane and lots in the middle plane. Observing left 3×3 area of middle plane, we can easily deduct that numbers 3 and 8 are missing. We put 8 in top left, because 3 can’t stand there (have a look at most right number in row 4) than we put number 3 in the other left square, because that’s all that is left. One area is filled. The middle area is unsolvable by this easy method – missing numbers 4, 6 and 8 are no where to be found in the near vicinity. Rightmost area of middle plane is missing the numbers 1, 2, 4, 5, 7 and 9. All of them – very easy. 1 is the only missing number in row 4, the middle square is the only that can hold 7 (see around), bottom left is for 5, and bottom middle is 9. The 2 numbers left we abandon for now (2 and 4). We keep that up, until we cover all easier areas and than go to harder ones. Takes about 2 minutes of trained eye to solve easy and normal grids.

“Dim view” method.

If you are using some online SuDoku client, you probably have a tool that does the same. If you are in front of the newspaper, you probably don’t :D. This method, as funny as it sounds is very useful for  people with good photo memory. Regardless the funny name I’ve put – It’s one of the fastest ways to find numbers in hard grids. Why am I calling it “Dim view“? Try to look at the grid and focus your eyes on one number only. The other appear a bit dim ;). With this focus you can easily see where a number can and cannot be. (see the pictures below). A trained “dim” eye can spot in one easy cycle the places of most numbers for less than a minute.

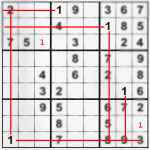
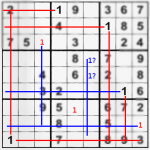
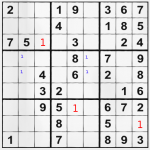
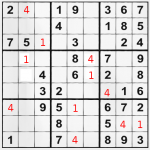
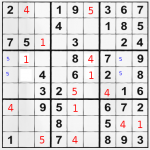
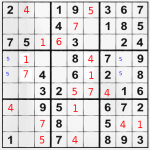
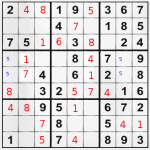
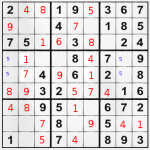
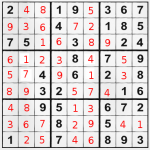
“1” can be put at top left area and bottom right area easily, because that’s the only position’s left for it. And having a second glance – another “1” can be put in the middle area of bottom plane after we put the two “1” numbers on the grid and having them in mind. Finally, you have 3 number “1” positions (red) and 2 number “1” probable positions (blue). If you continue using this method for all digits, you will see that 2 and 3 are unsolvable in this easy way. On the other hand the number “4” covers all the grid and the 2 number “1” we put with pencil (see the blue digits above) can be put with pen, because one of the “4” is ruling their exact places out. Number “5” is very easy, leaving only 2 areas unsure. “6” has only one possible position, so we quickly abandon it. “7”, “8” and “9” are another very easy grid-fillers. All that is left are … few baby steps, to complete the whole grid. It is very easy now to find the missing places of “2”, “3” and the few “5” missing.

This method is a lot faster than the previous, because it solves all 9 areas for less time and gives you better perspective what and where is missing. It’s not very applicable for all hard grids and is not very good for very hard and impossible grids. I still use it on harder grids, to see if there is good “weak spot” or “weak number” to cover it for few seconds at a glance. For harder grids, you have to look part II of this article.

 Posted by at 3:13 pm